xCloud Backup Setup for Terramaster
Step-by-Step Guide
xCloud: Obtain credentials for xCloud Backup
Info
Prerequisites: Registered xCloud account, confirmed activation email.
1. Log in to xCloud
2. Select the "xCloud Backup" product
3. Choose one of the packages (Safe S to XL) and activate it
4. Note the two credentials (Access Key and Secret Key)
5. Create a bucket, optionally with Object Lock enabled

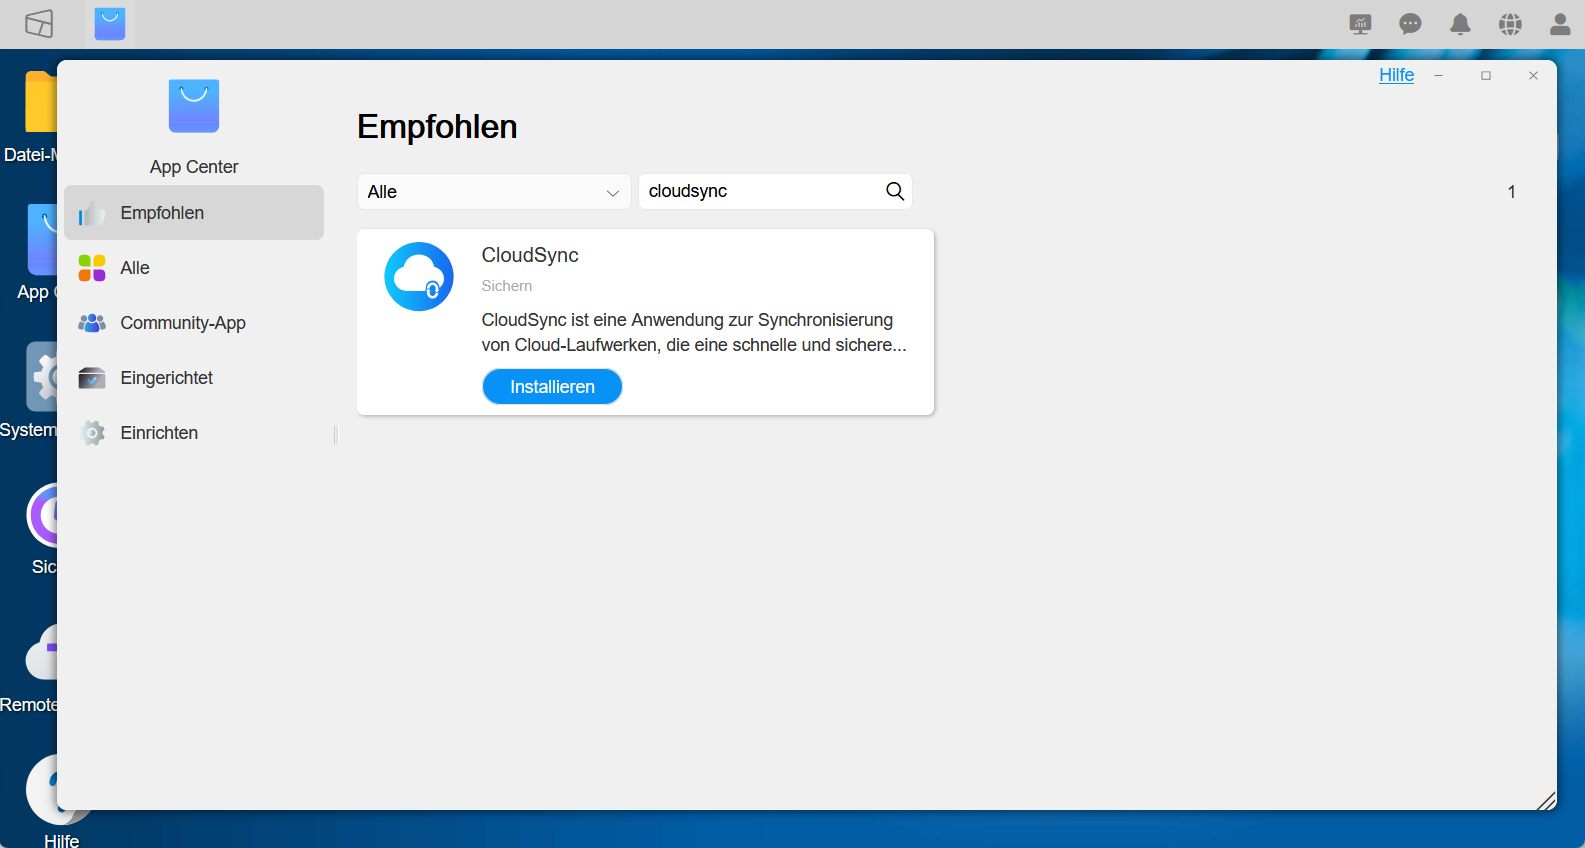
Terramaster: Install CloudSync
6. Open the "TOS" application for managing Terra Master NAS. 7. Open the "App Center" application, find & install the "CloudSync" application.
CloudSync: Set up a new backup
8. Open the "CloudSync" application. 9. Create a new connection:
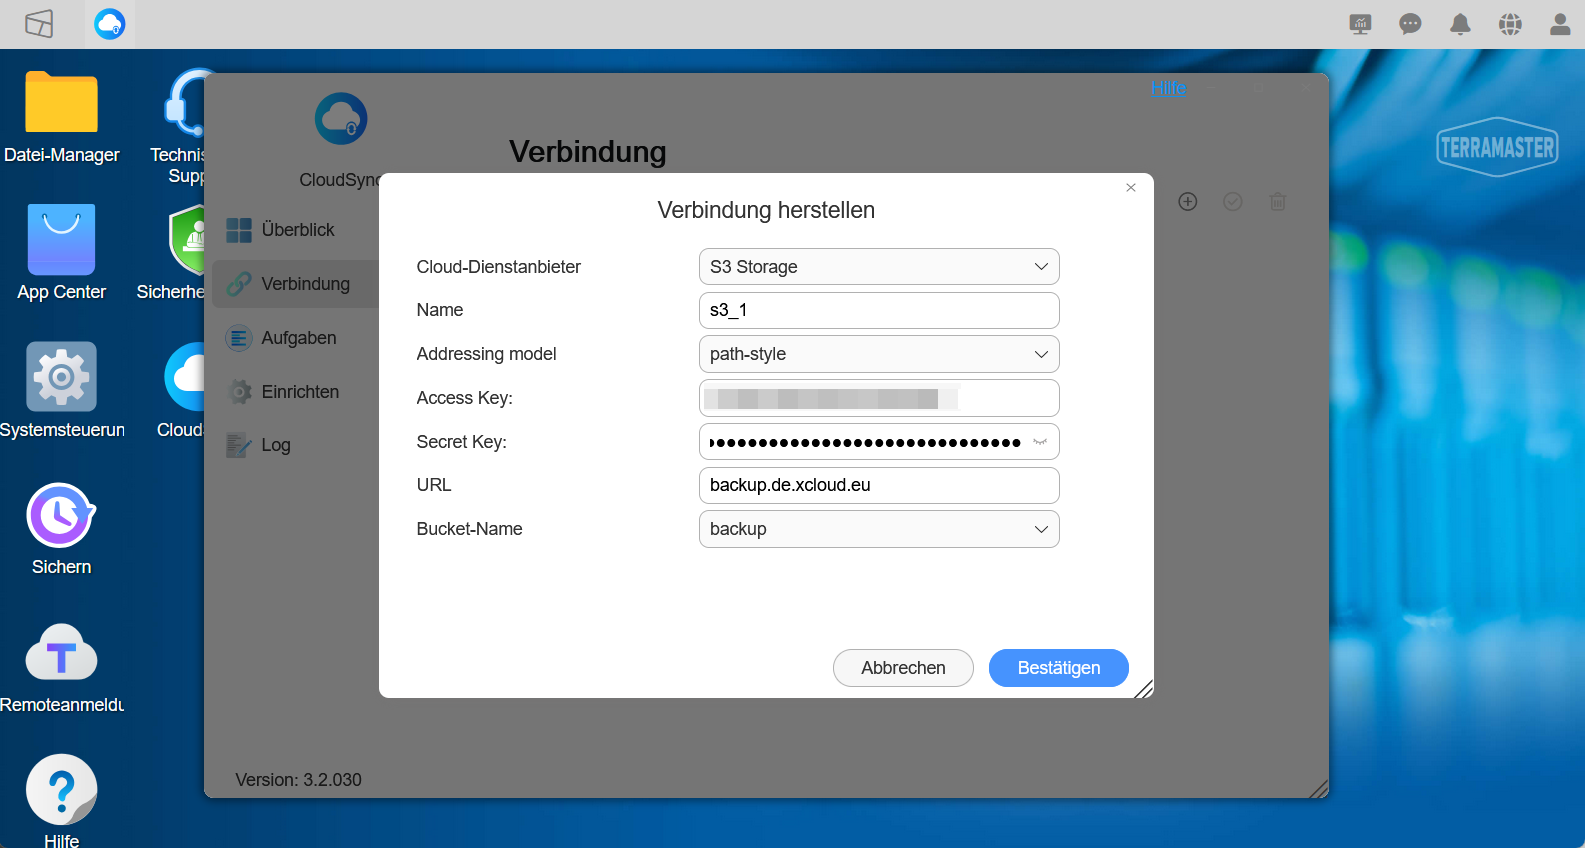
- Type: “S3 storage”;
- Name: give a name for the connection: e.g., “s3_1”;
- Addressing Model: select “path-style”
- Access Key: Input
Access Keyfrom step 4 - Secret Key: Input
Secret Keyfrom step 4 - Input URL:
backup.de.xcloud.eu - Select a bucket, e.g. the default “backup”
- Save the changes.
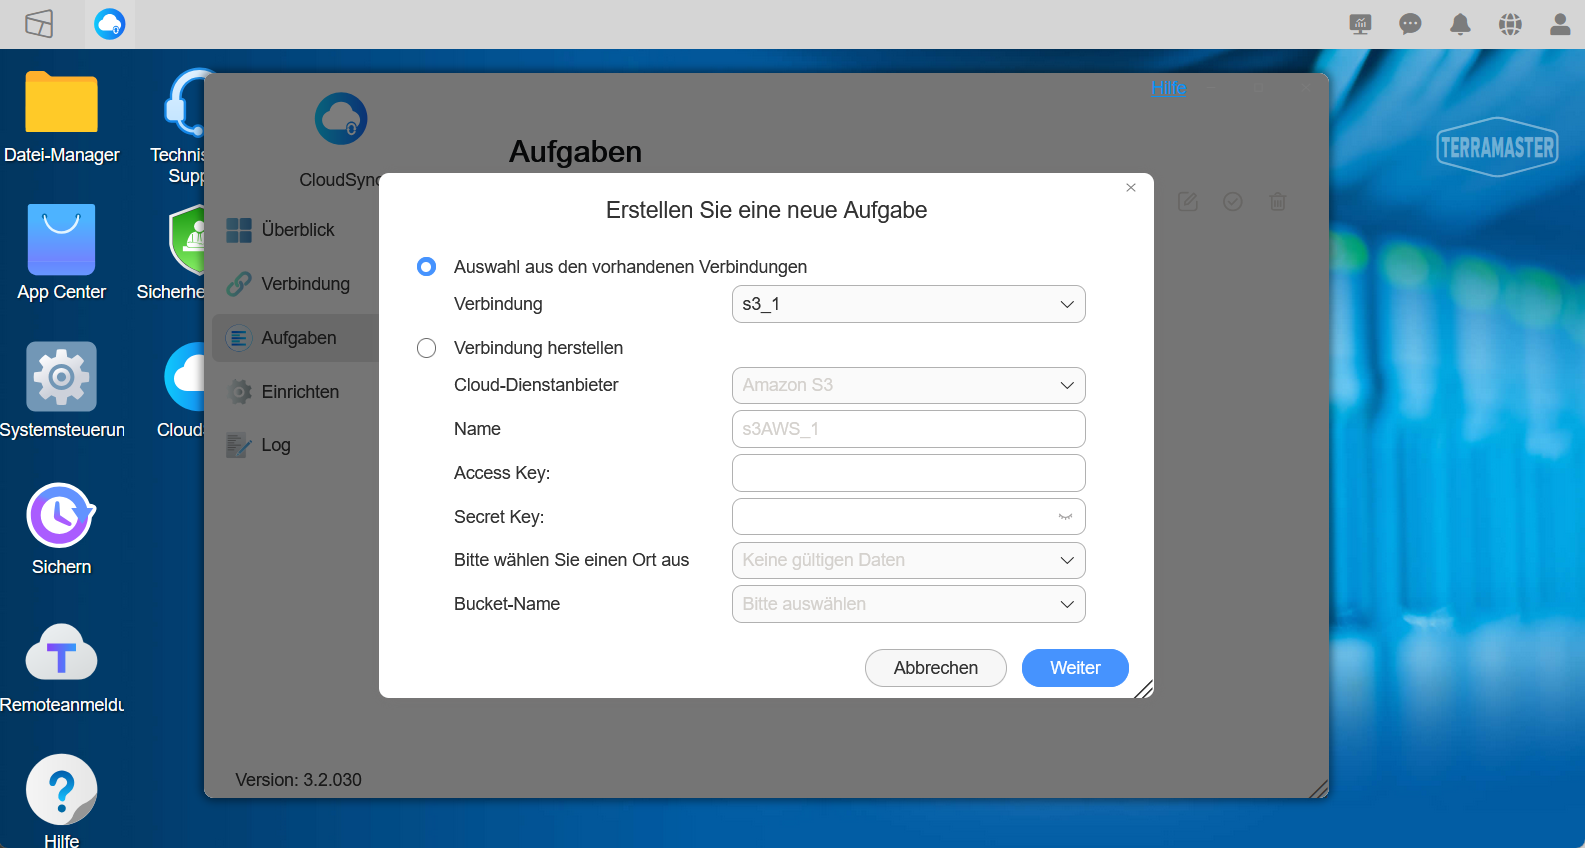
10. Create a synchronization task: first, pick the connection created in the previous step
11. On the next screen, set up a task details:
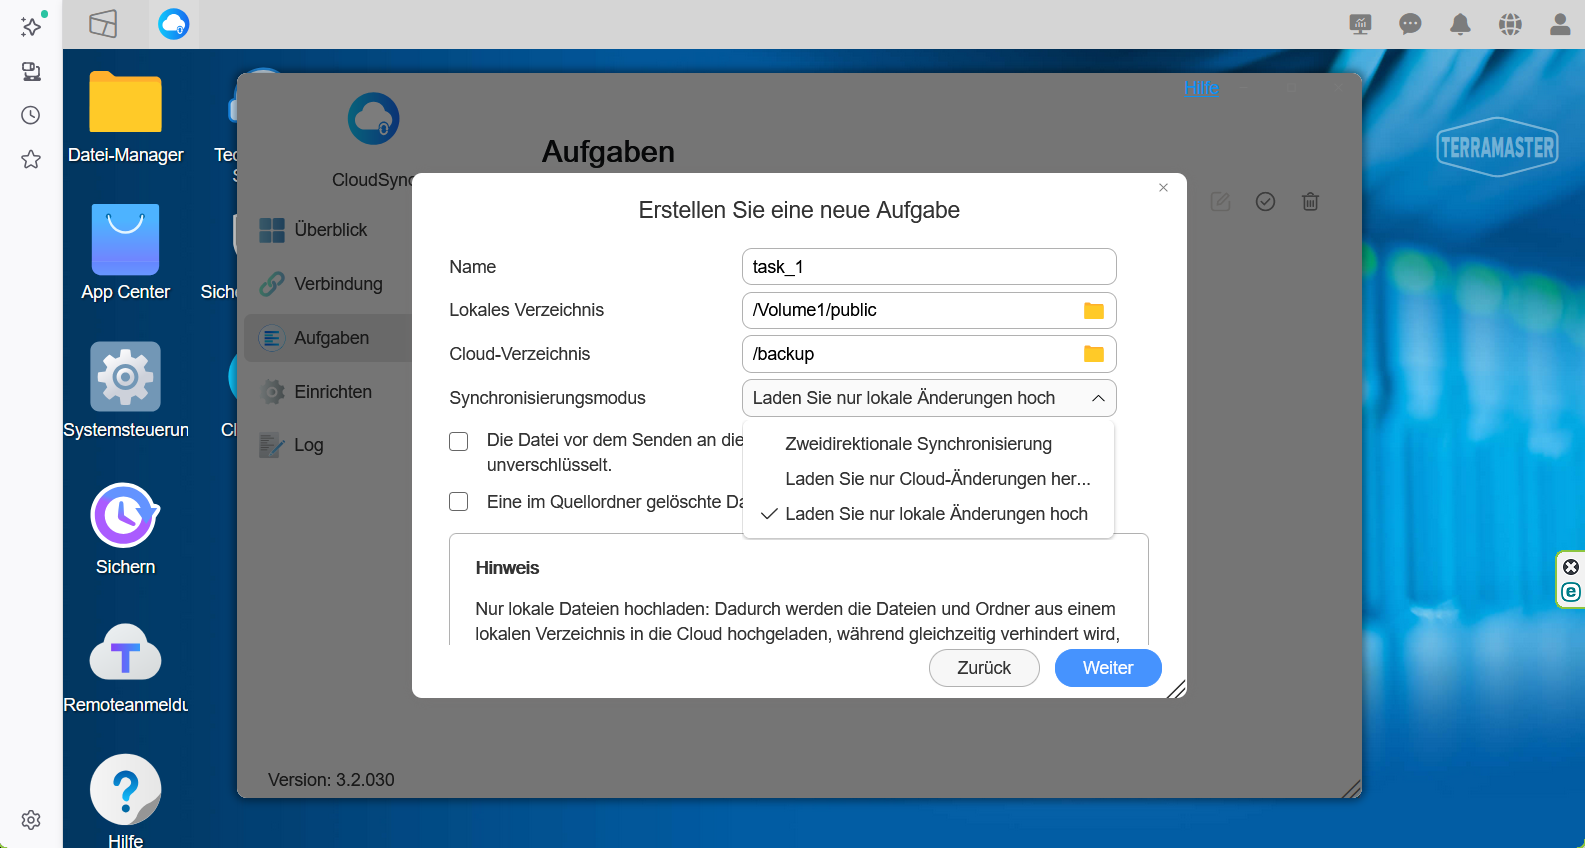
- Specify a name for the task. e.g. “task_1”
- Pick the folder that has to be synchronized
- pick the cloud backup bucket
- select a synchronization mode (for backup: "Upload local changes only") and proceed to the next step.
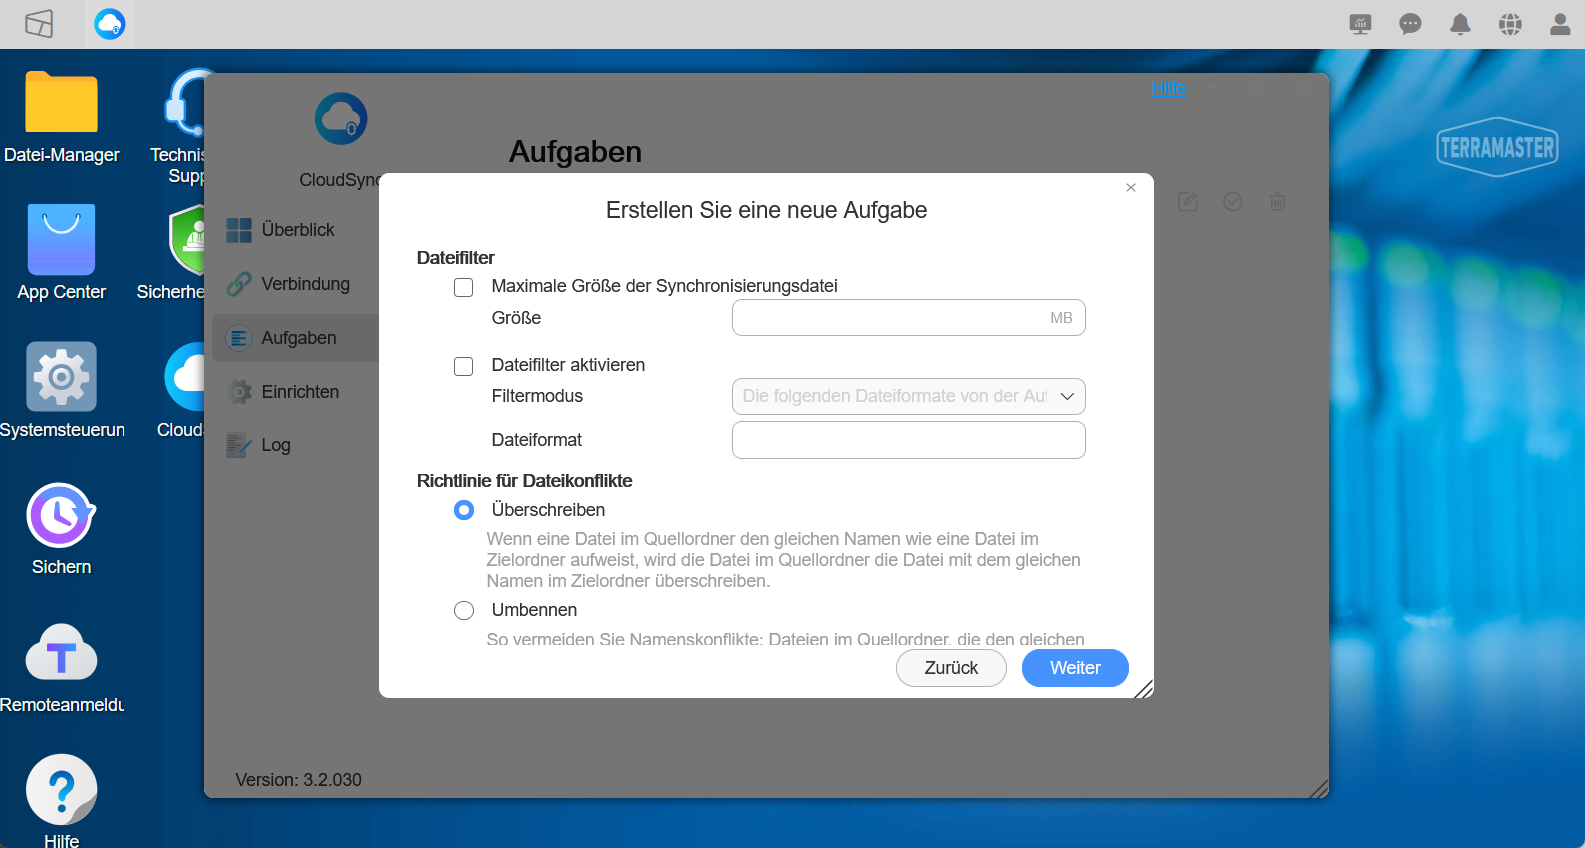
12. Specify additional settings for the task
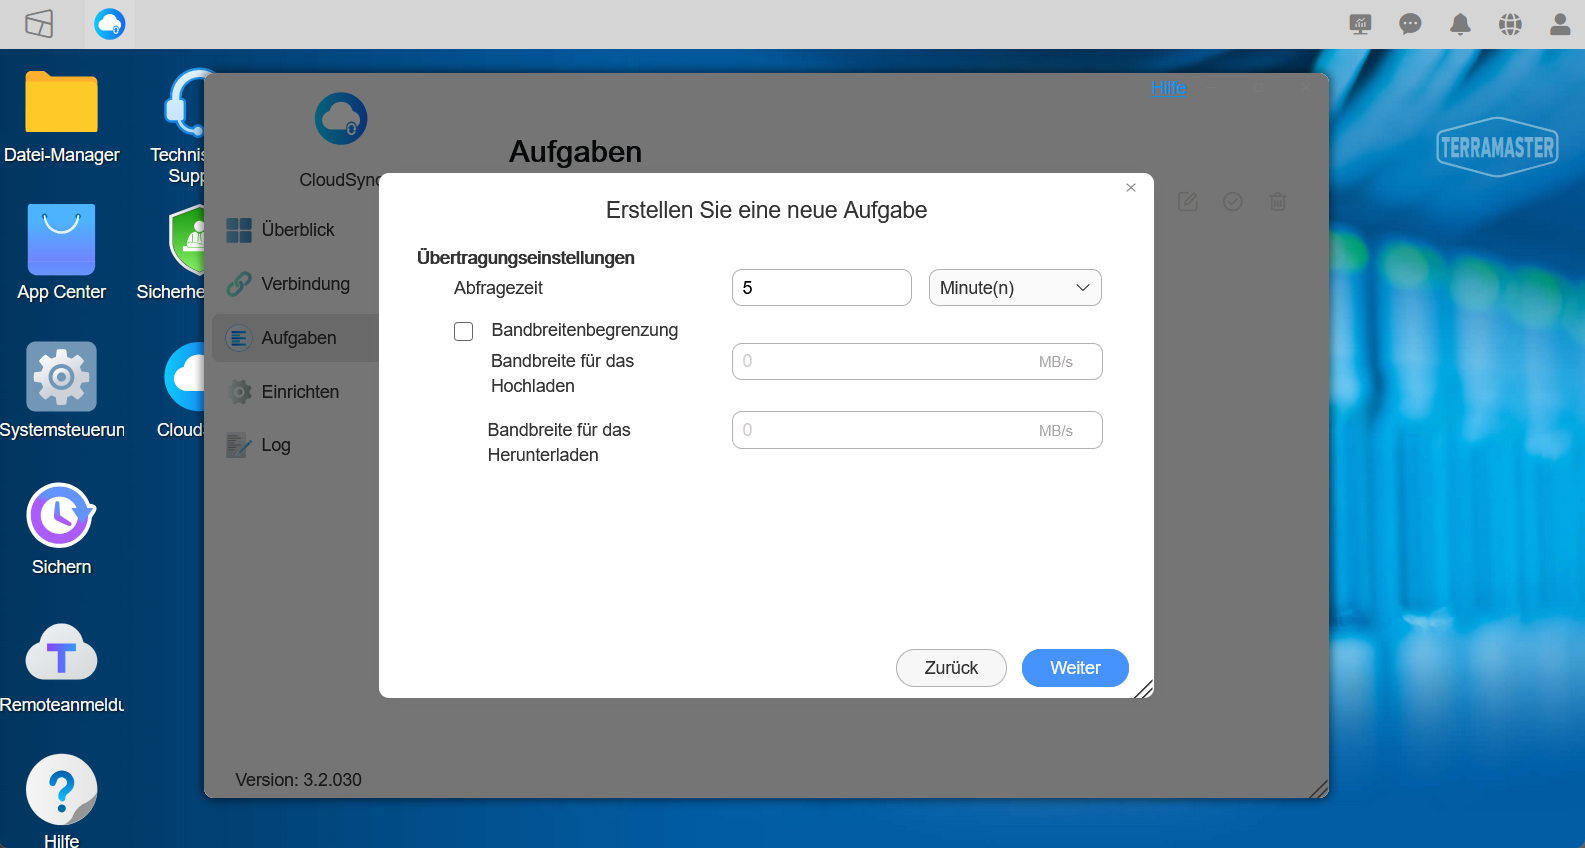
13. Set up frequency and bandwidth, if needed
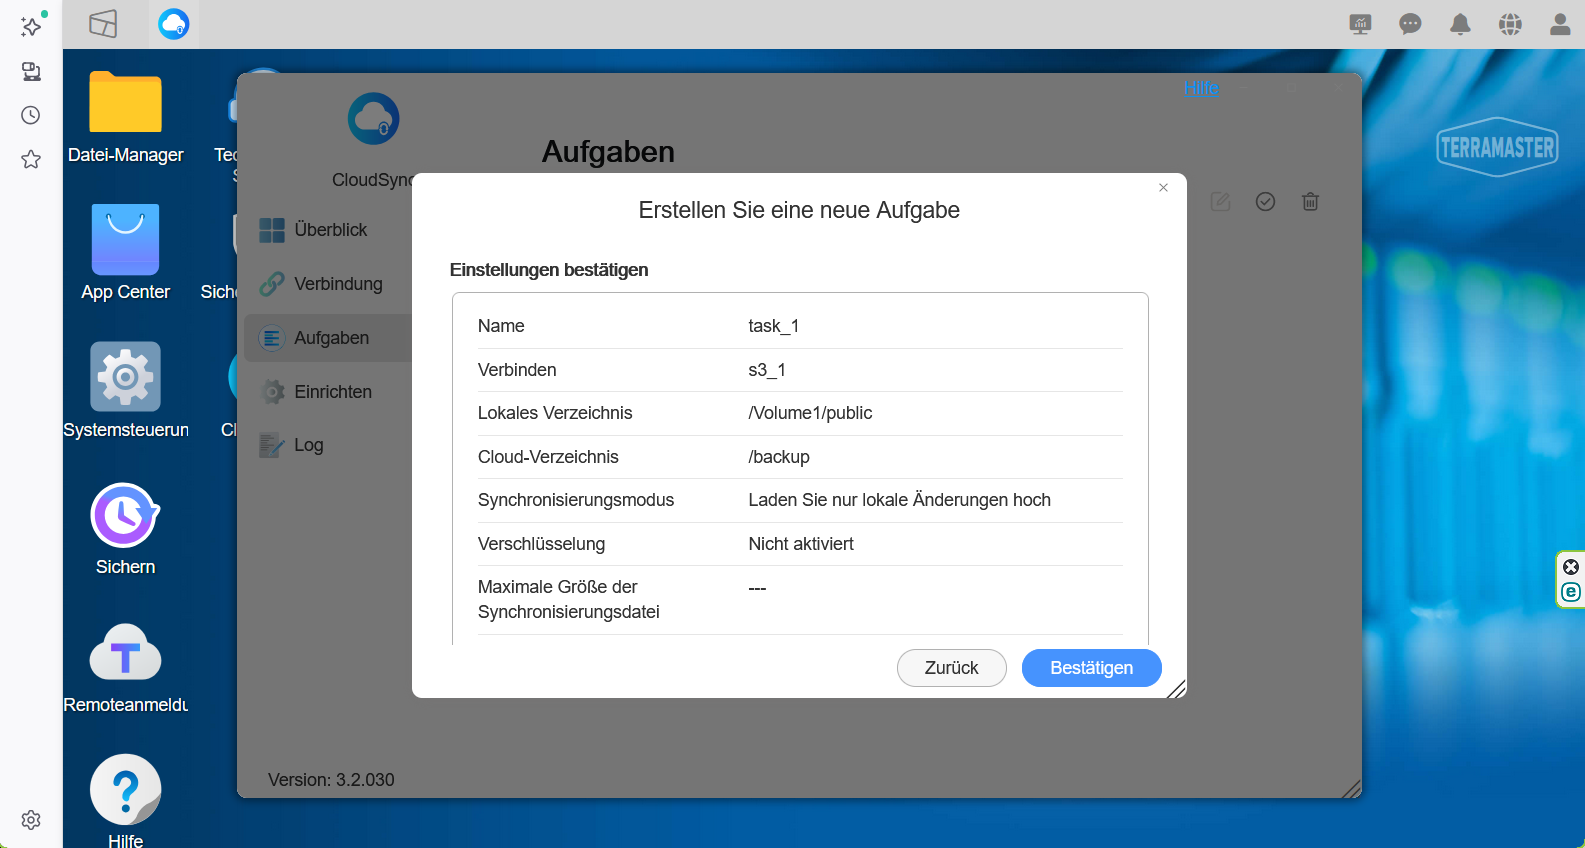
14. Check all the settings for the task and save them
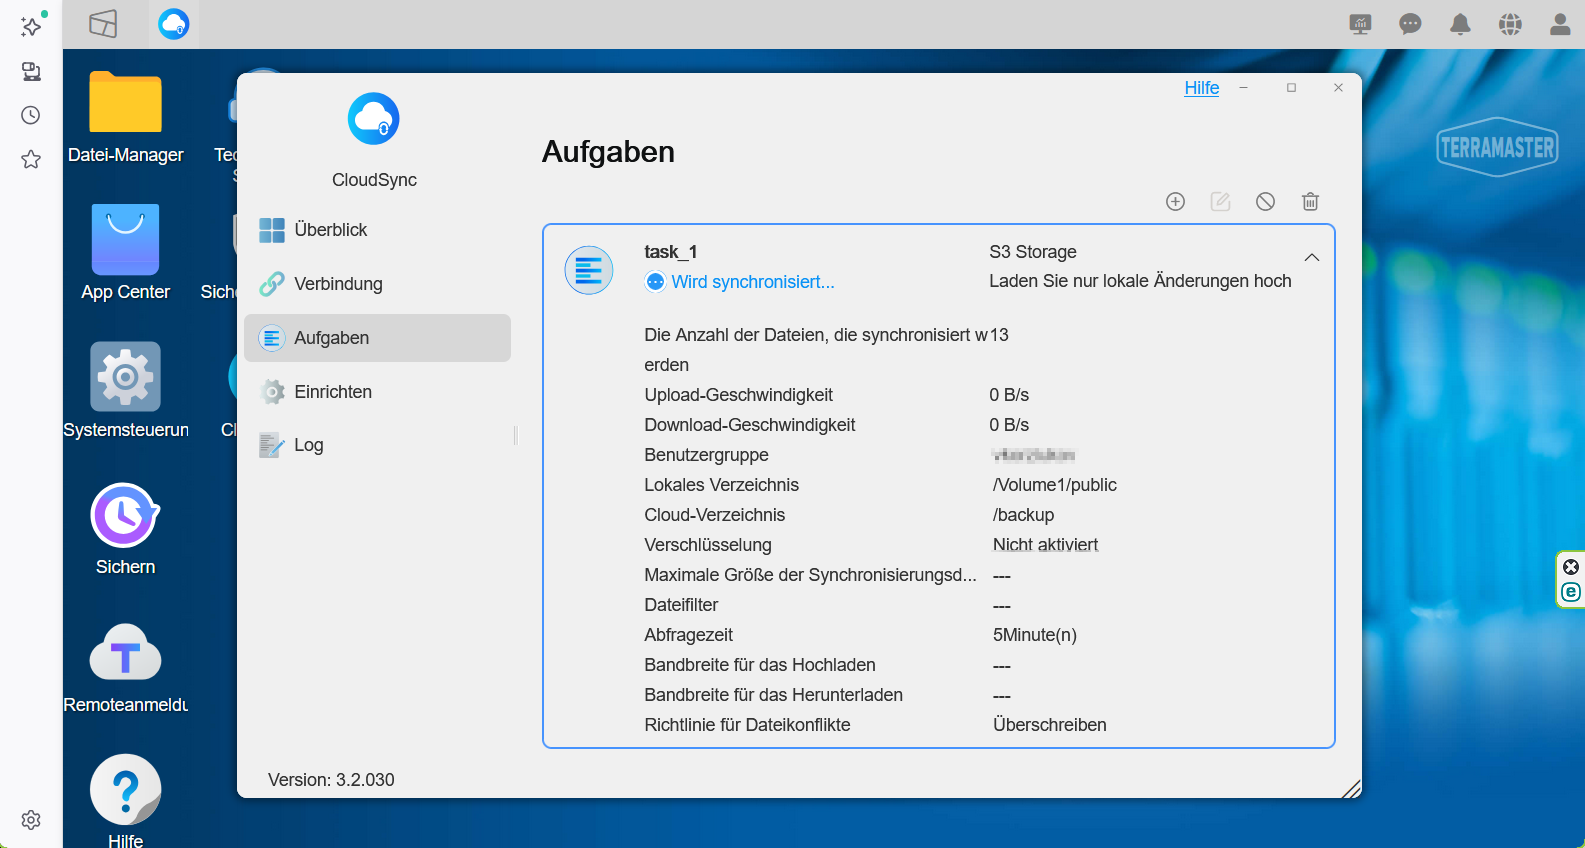
15. Make sure that the task has been created and it's active
Additional Resources
- Article CloudSync in the official Terramaster documentation