xCloud Backup Setup for QNAP
Prerequisites
- Registered xCloud Account, activation email has been confirmed
Step-by-Step Guide
xCloud: Obtain Access Credentials
1. xCloud Portal Preparation
- Log in to the xCloud web app
- Select the product "xCloud Backup"
- Choose and activate a package (Safe S to XL)
- Remember the two access credentials (
Access KeyandSecret Key) - Create a backup bucket, optionally with object lock enabled

QNAP: Install Hybrid Backup
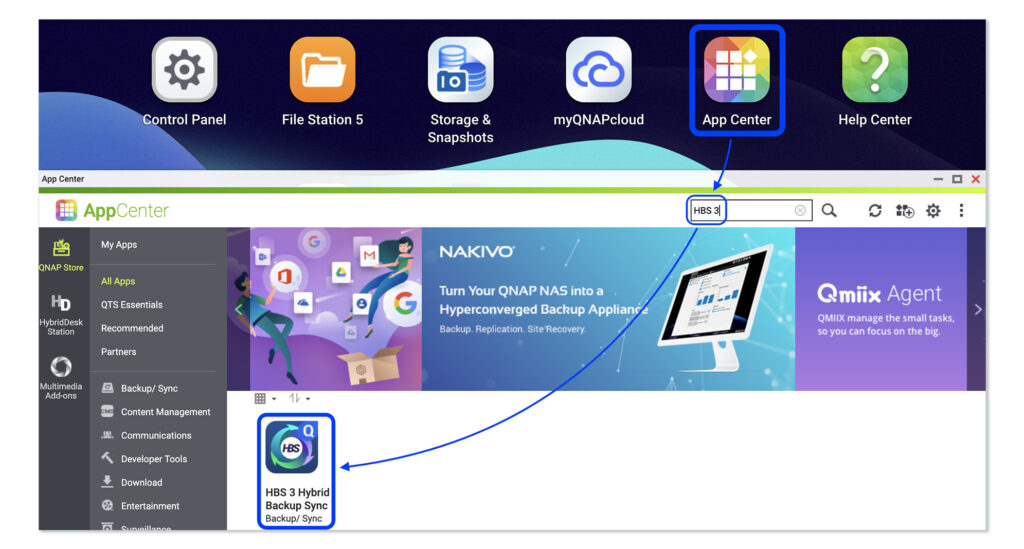
2. Install HBS Hybrid Backup
- Open QNAP App Center
- Search for "HBS 3 Hybrid Backup Sync"
- Install and open the app
Hybrid Backup: Configure Backup
3. Create Storage Space
- Select "Storage Spaces"
- Click on "Create"
- Choose "Amazon S3 & S3 Compatible"

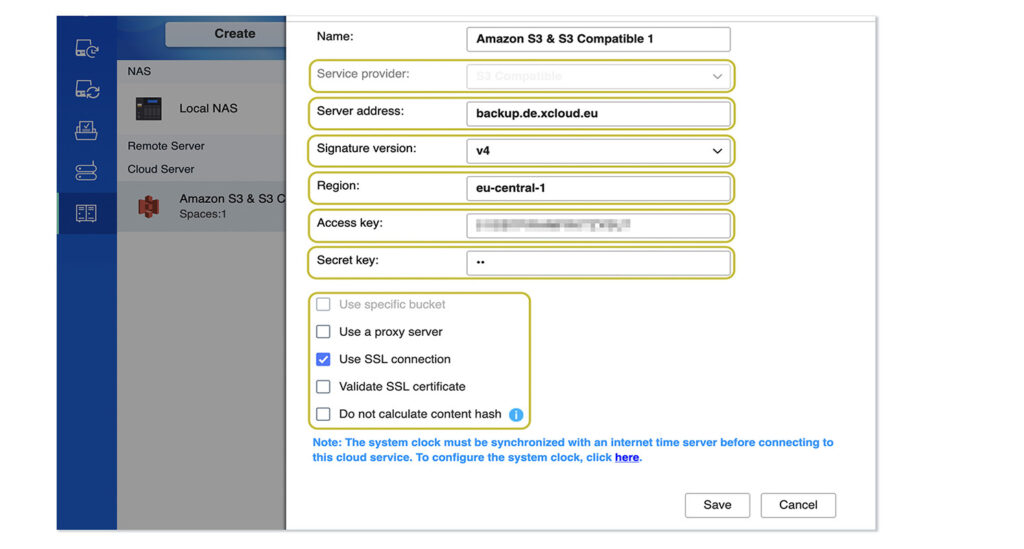
4. Configure Storage Space Details
- Server address: "backup.de.xcloud.eu"
- Signature version: "v4"
- Region: "eu-central-1"
- Access Key:
Access Keyfrom step 1 - Secret Key:
Secret Keyfrom step 1 - Enable "Use SSL connection"
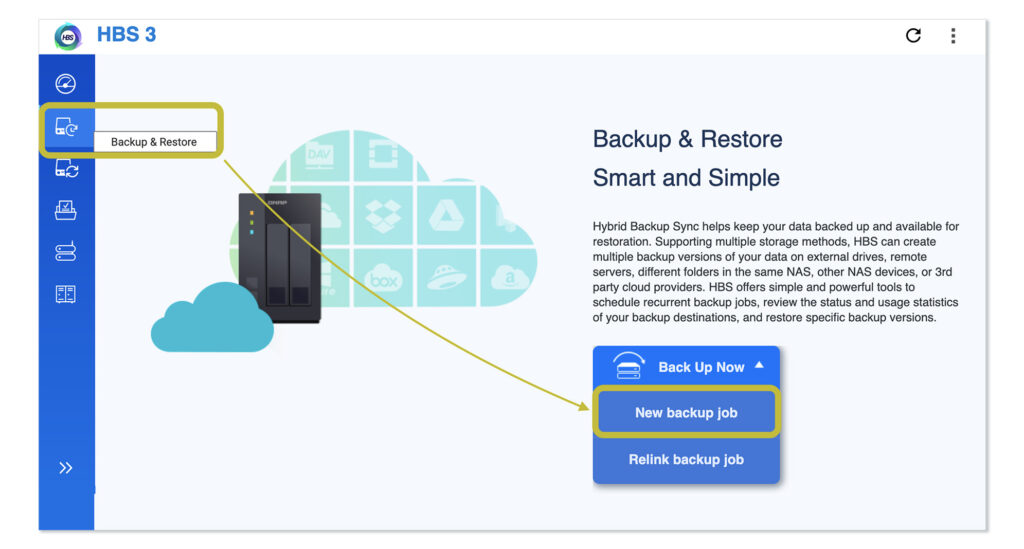
5. Backup Configuration
- Navigate to "Backup & Restore"
- Select "New Backup Job"
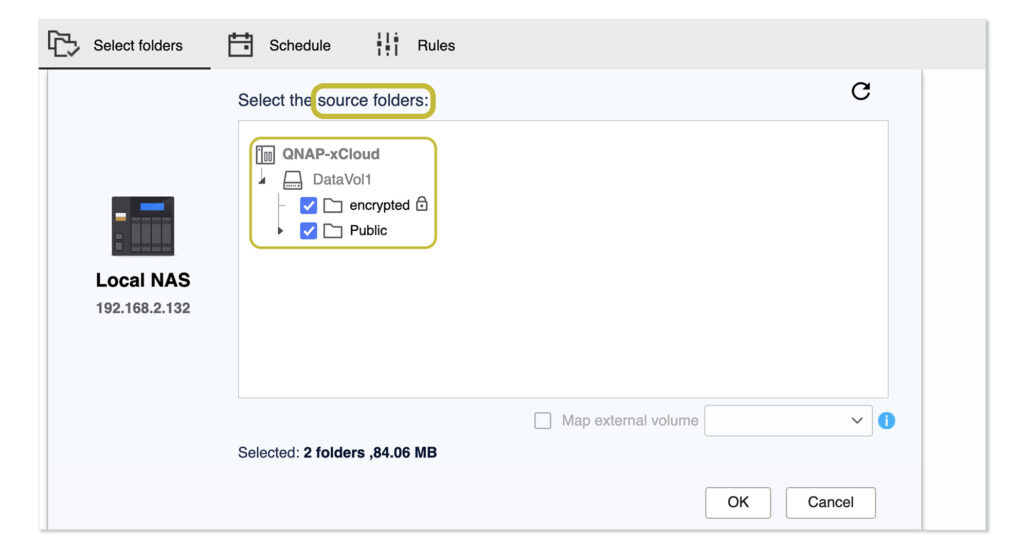
6. Folder Selection
- Choose the folders to back up
- Confirm with OK
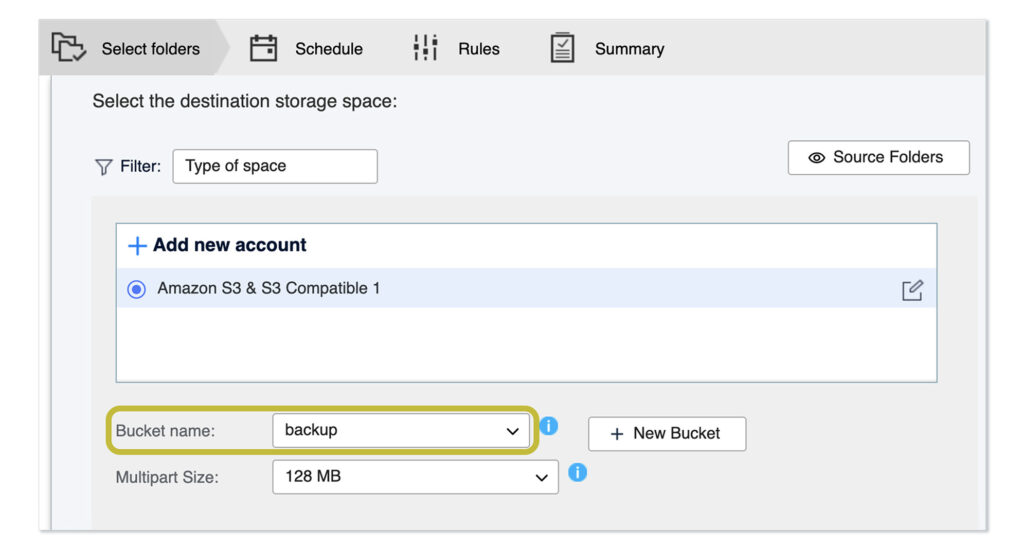
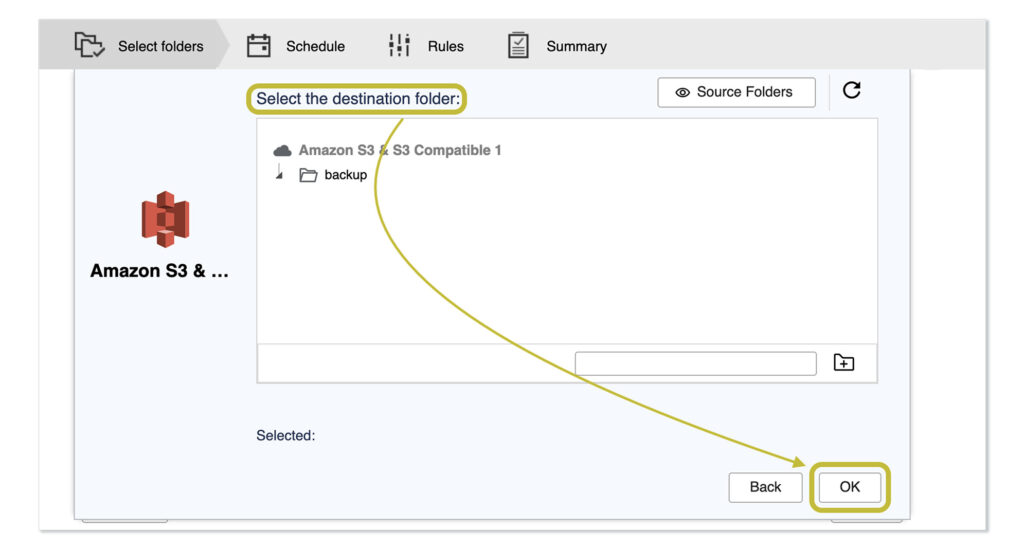
7. Destination Selection
- Select the storage space created in steps 3 & 4
- Choose the bucket you have created at the beginning. It is called "backup" by default.

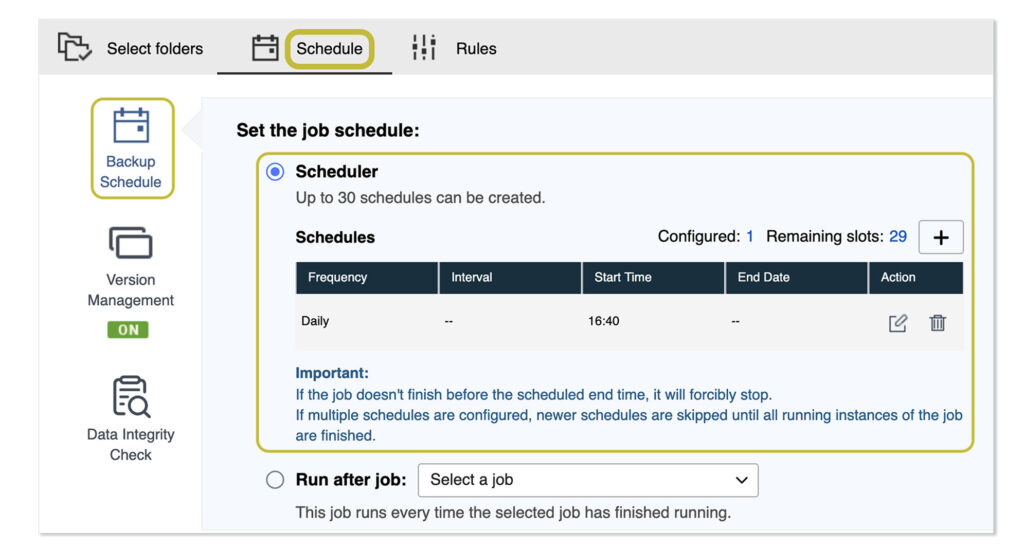
8. Schedule
- Set backup frequency and time (daily/weekly at night recommended)
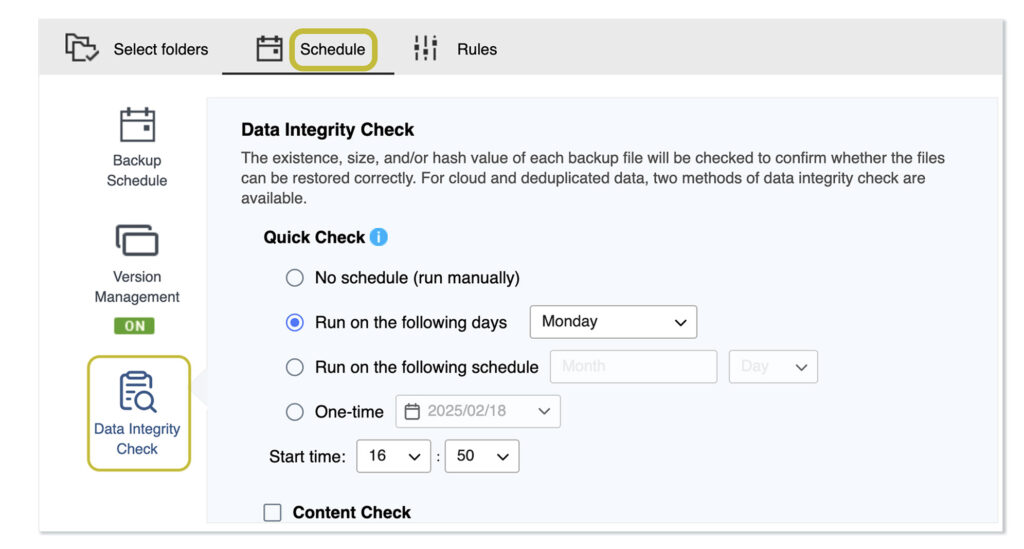
9. Data Integrity Check
- Configure data integrity checks (recommended every 2-4 backups)
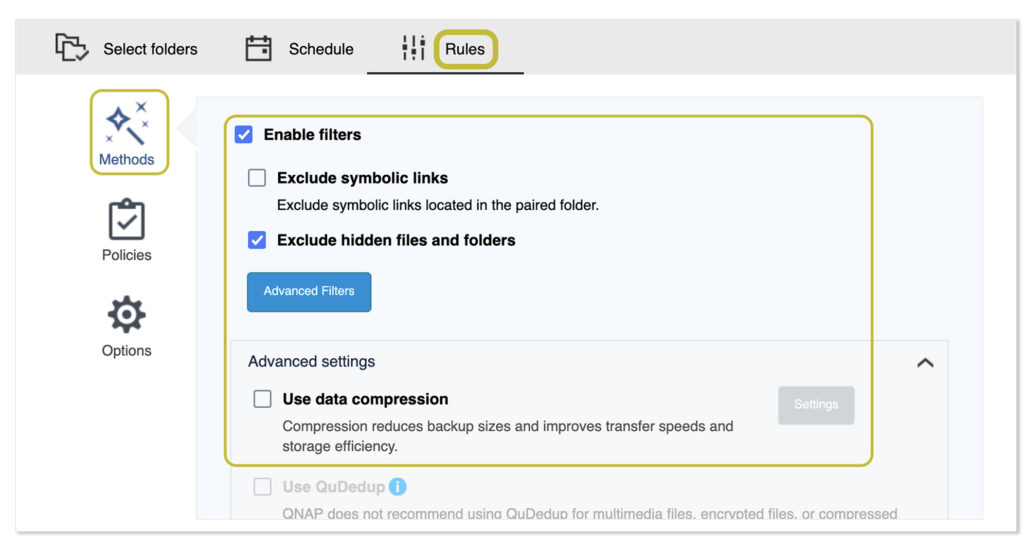
10. Additional Settings
- Optional: Decide whether the data should be compressed.
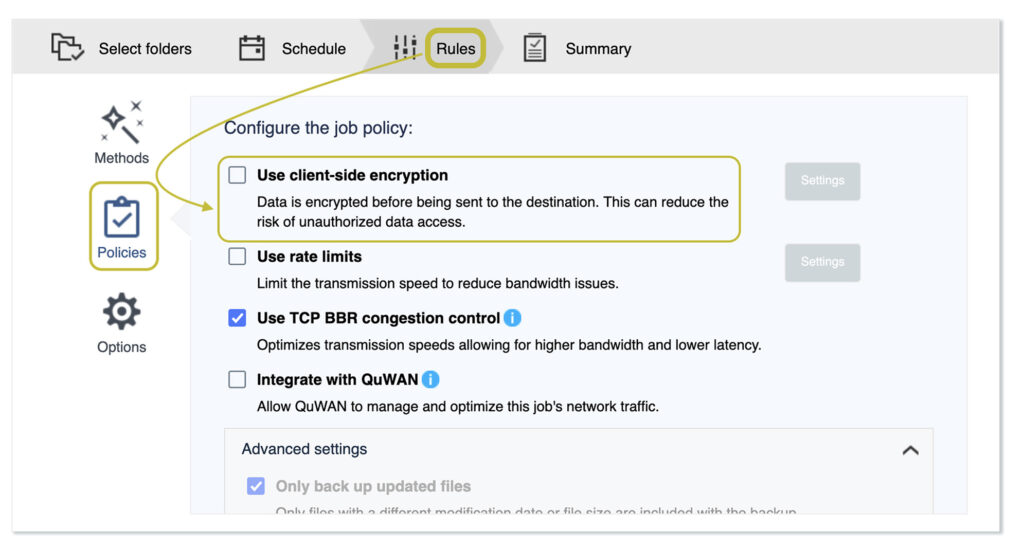
11. Client-side Encryption
- Recommended: if you want the data to be encrypted (client-side), this can be selected in the "Policies" section:
Warning
Ensure secure encryption key storage. The backup cannot be restored without the encryption keys.
Additional Resources
- QNAP, Backup Quick Start Guide for HBS 3 (Hybrid Backup Sync)
- QNAP, Detailed documentation on Hybrid Backup Sync (HBS 3)