xCloud Backup Setup for Asustor
Prerequisites
- Registered xCloud account
- Confirmed activation email
- NAS with configured ADM web interface
Step-by-Step Guide
xCloud: Obtain Access Credentials
1. Activate xCloud Backup
- Log in to the xCloud Dashboard
- Select "xCloud Backup" product
- Choose the package size (Safe S to XL)
- Remember the two access credentials (
Access Key,Secret Key) - Create a bucket, optionally with Object Lock enabled
Asustor: Configure Backup
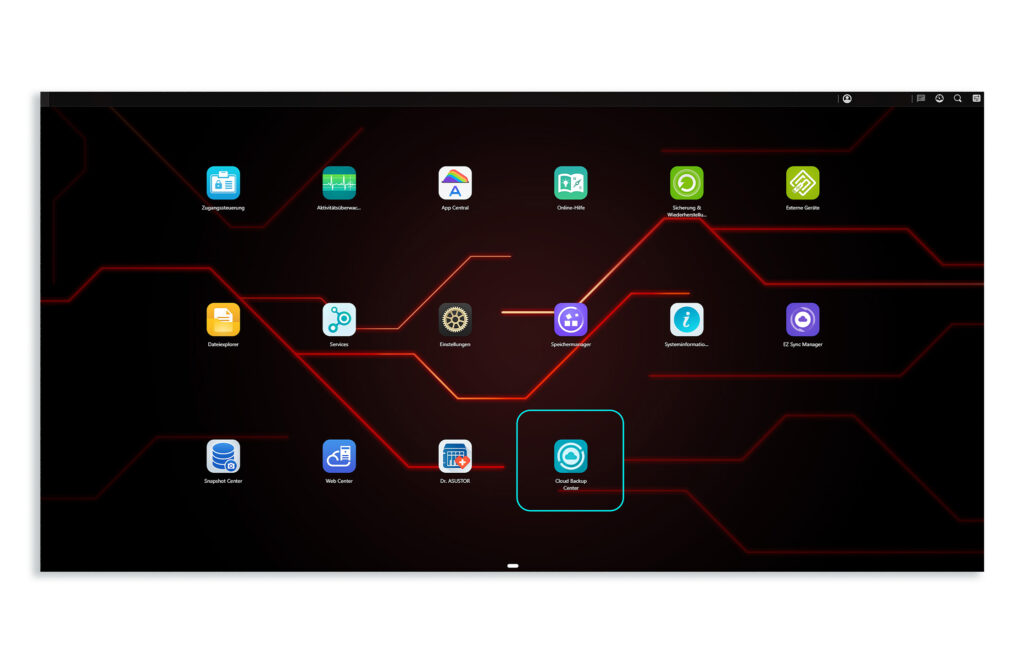
2. Open Cloud Backup Center in the Asustor NAS interface
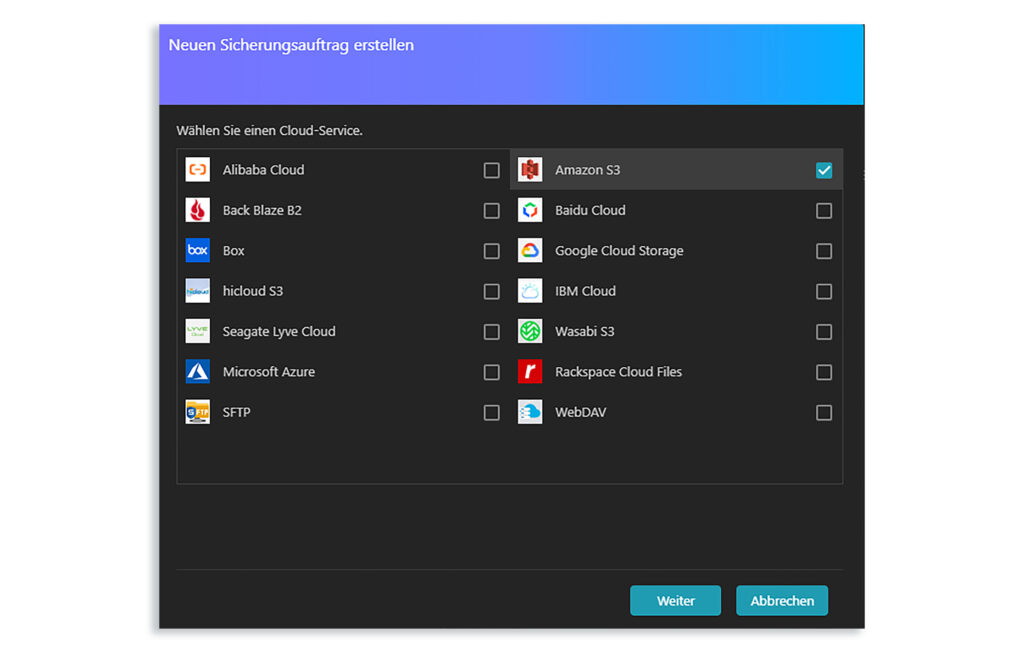
3. Configure Cloud Backup Service
- Click on "Start"
- Select "Amazon S3"
- Choose "Optional Server"
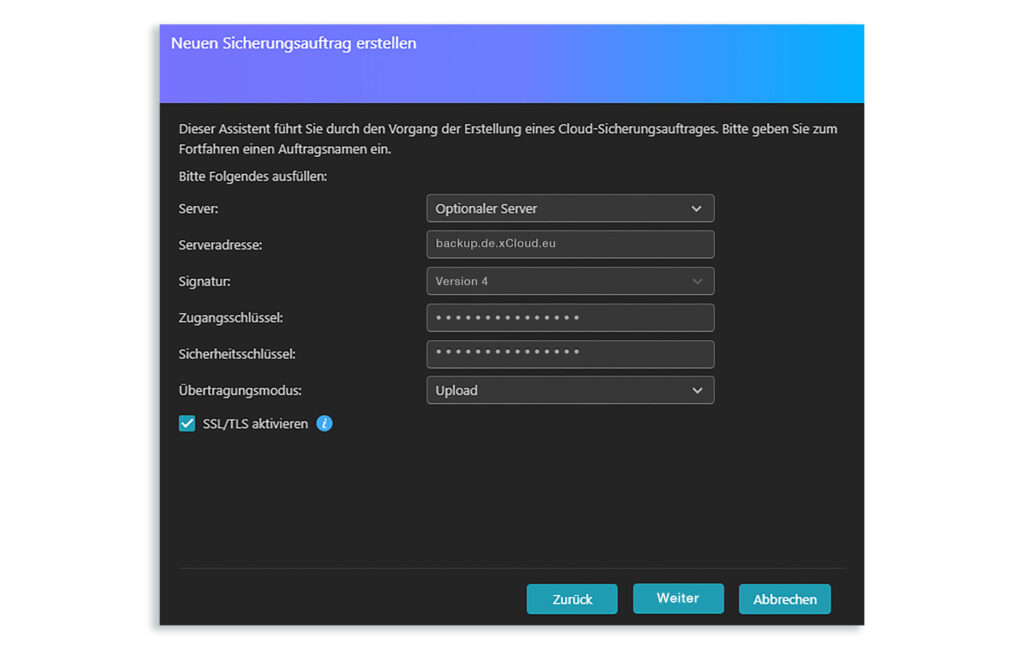
4. Enter Credentials
- Server address:
backup.de.xcloud.eu - Signature: Version 4
- Access key:
Access Keyfrom step 1 - Secret key:
Secret Keyfrom step 1 - Keep the transfer mode "Upload"
- Keep "Enable SSL/TLS" enabled
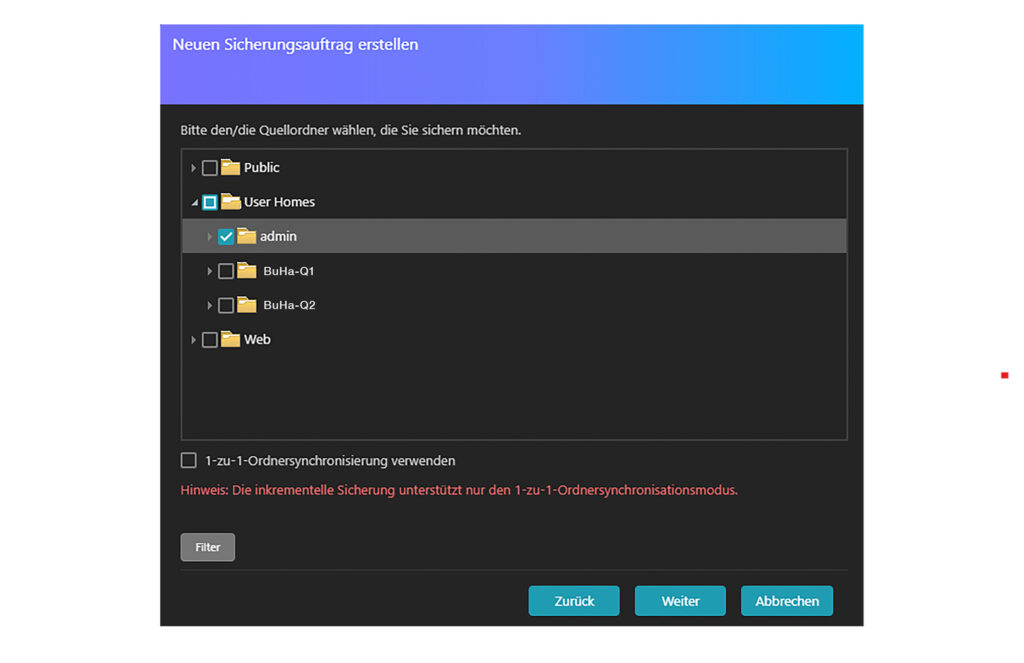
5. Select Source Folder
- Choose the NAS folders to back up
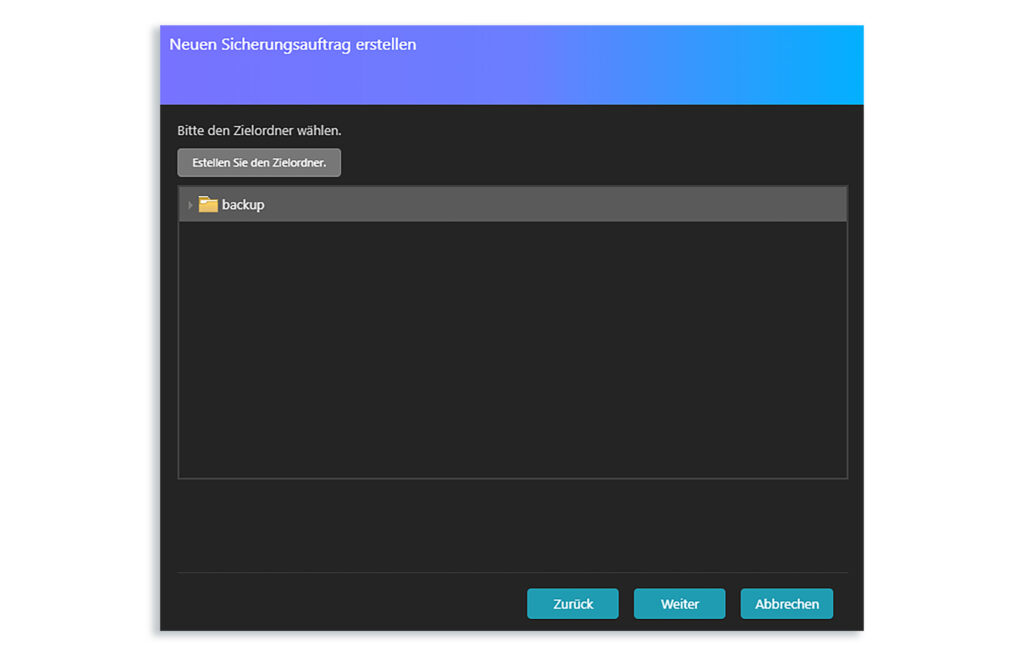
6. Select Destination Folder
- Choose the "backup" bucket
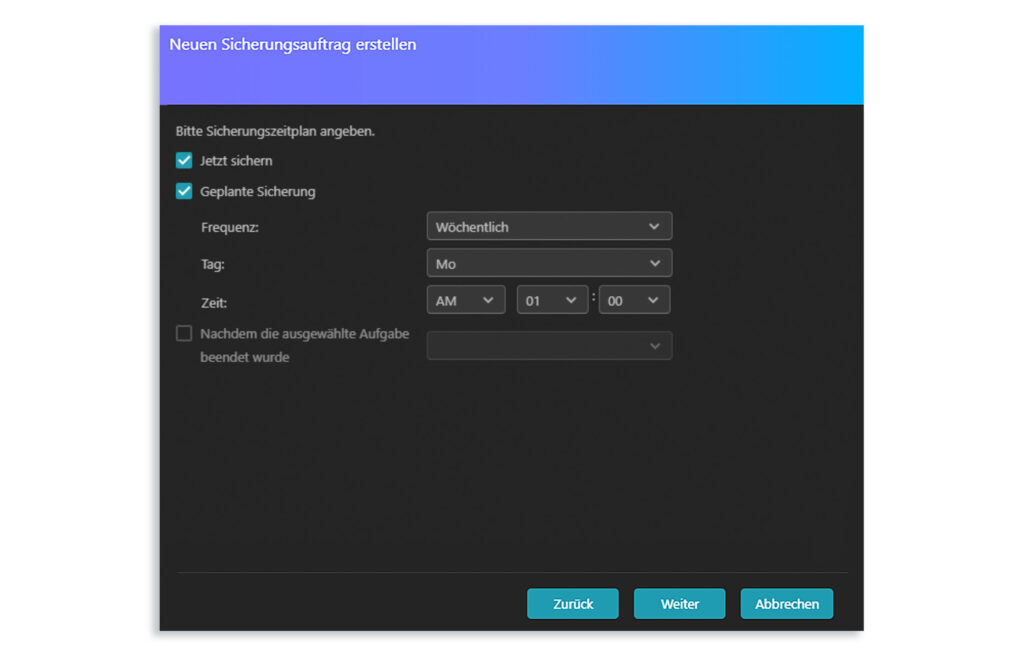
7. Create Backup Schedule
- Options: "Now" or scheduled backup
- Set the frequency (daily/weekly recommended)
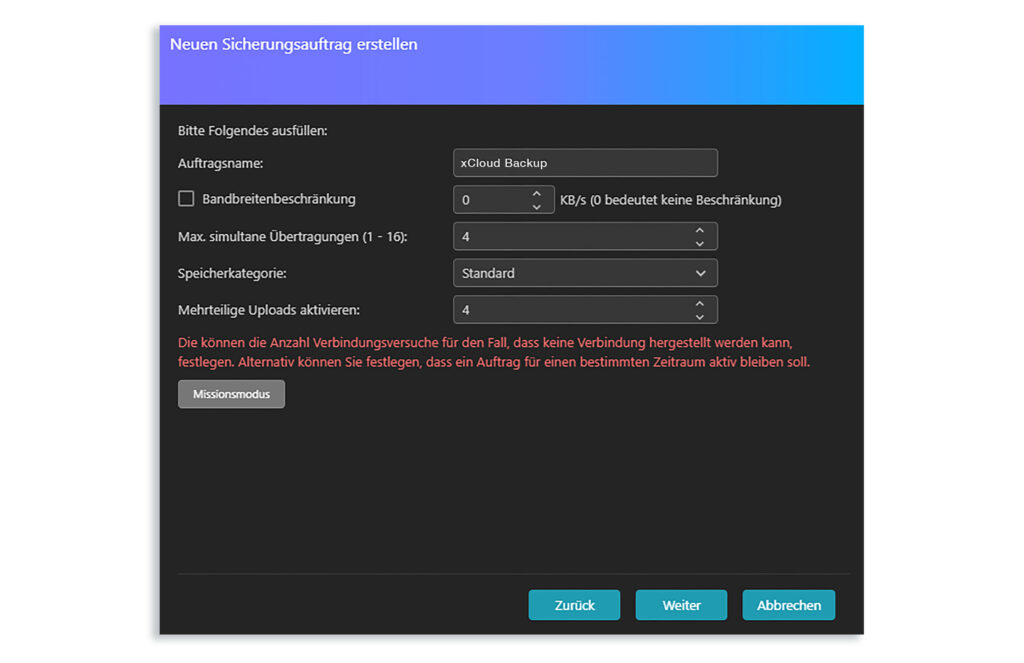
8. Optional Configuration
- Name the backup task, e.g. "xCloud Backup"
- Leave "Bandwidth limitation" disabled - the backup runs at night
- Leave "max. simultaneous transfers" on the default value "4"
- Leave "Storage class" on the value "Standard"
- Leave "Enable multipart uploads" on the default value "4"
9. Confirm Settings
- Review the backup task details
- Click on "Finish"
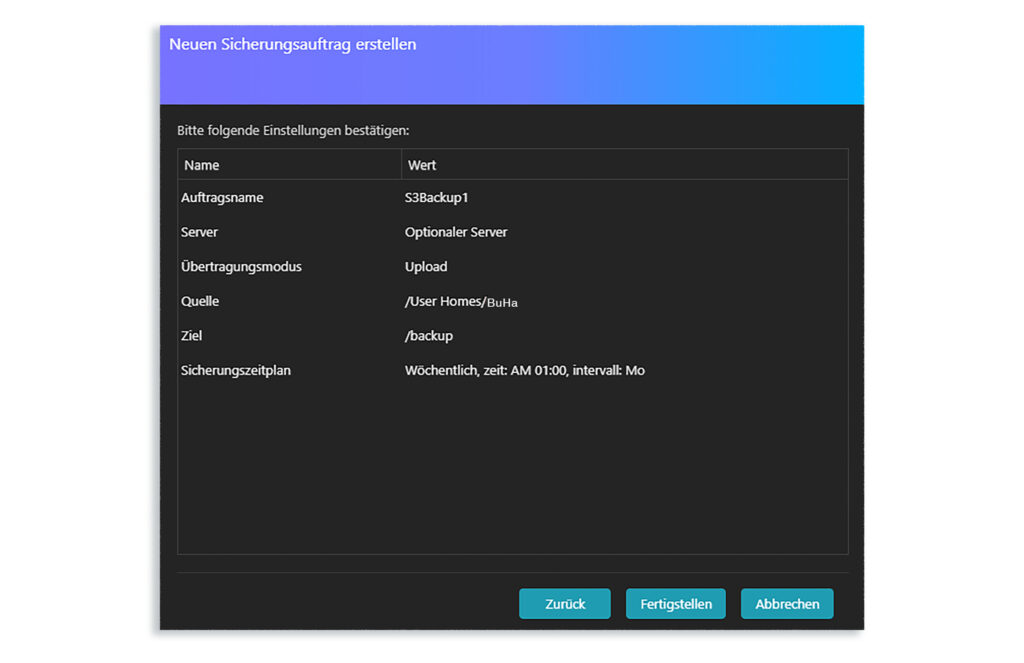
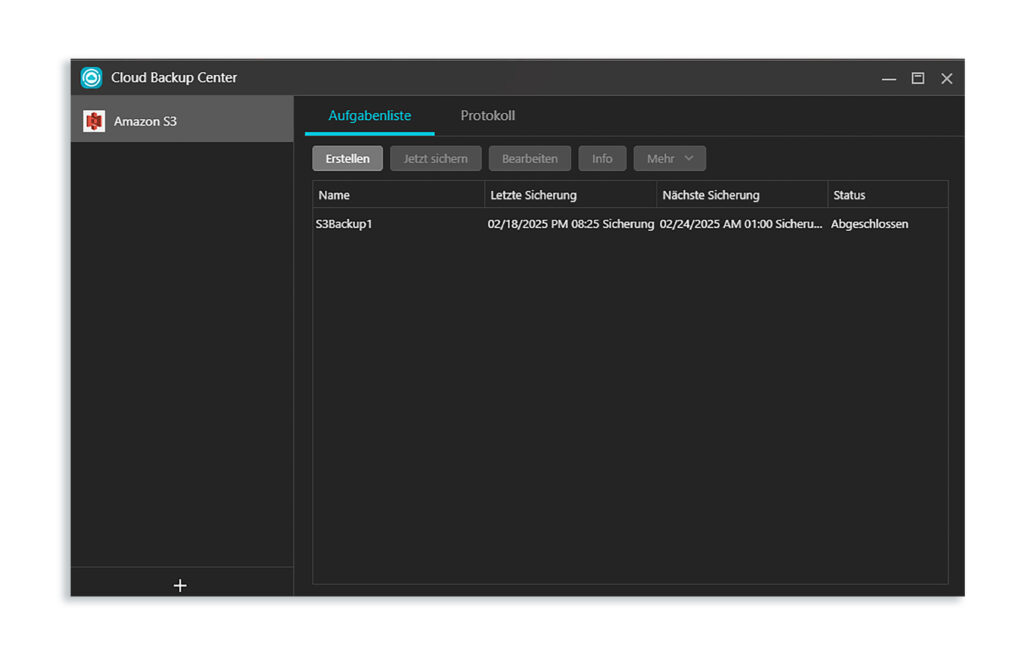
The backup task status will be visible in the Cloud Backup Center.
Additional Resources
- Article How should I backup my NAS? in the Asustor Knowledge Base